tips and tricks for making a delicious pavlova, by WC
This post was written for yooou! by 15 year old, WC.
Airy, Sweet, and visually stunning, Pavlovas are one of my favorite things to make. Not to mention, the fun process of whipping up meringue and plating them with colorful fruits and creams.
I’ve always been using recipes from Sally’s Baking Addiction for many things, so here I am linking the three recipes I used from her!
*note*: In this blog I am making a big pavlova cake, however the recipe can be adjusted for small personal pavlovas as well
Pavlovas are tricky to make and get right. In this blog I’ll be sharing tips and adjustments I follow to make my signature pavlova!
First thing you’ll want to do is make the meringue base. This base takes a while to bake so you can make all your other components while it’s baking and drying!
Usually when I make my pavlovas I like to use a silicone baking mat since it peels off the easiest when you’re trying to remove the base from the baking tray later. However any nonstick sheet works!
Follow the recipe instructions for whipping up the meringue. I highly recommend pulsing your sugar in the food processor a few times because it makes the meringue smoother and reduces the chance of pockets and cracks. When the meringue is ready it should feel like a firm marshmallow cloud. The meringue should have a smooth feel in your mouth and stand up on the whisk.
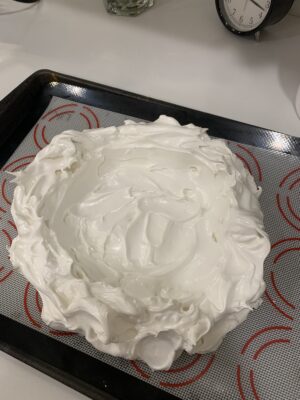
Next, when you spoon the meringue onto your baking tray, I recommend dumping it into a huge lump in the middle of the tray and spreading it out with a soup spoon. The back of the soup spoon can be used to make the decorative swirls and peaks on the pavlova.
Make sure to form the “well” in the middle with “walls” on the side. The well is where your cream, lemon curd, and other delicious components will go! Make sure the bottom of the well isn’t so thin it’s see through. The pavlova looking good in this stage is very important since unlike pastries, meringue doesn’t spread and what it looks like now will be what it looks like later.
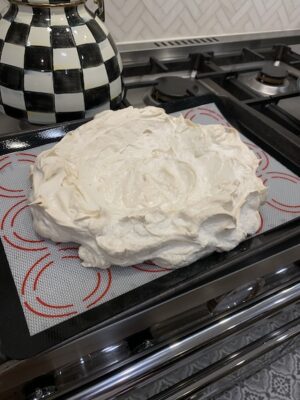
Follow the baking instructions. Once it’s done baking, if the pavlova isn’t browning harshly or “burnt-looking” , turn the oven off but keep the pavlova in there so it’ll dry in an arid environment. I recommend not opening the oven at all during the baking process if possible so the meringue can settle.
Now onto the fillings!
Although the whipped cream recipe asks for sugar, when I make my pavlova I like to add no sugar to the whipped cream. The meringue itself is very sweet and the whipped cream should be a relief to the sweetness, not add to it.
Pavlovas are traditionally piled high with fresh fruits and are SO PRETTY.
For fruits, I generally recommend berries and other soft fruits such as kiwis and peaches and cherries. I generally don’t recommend “crunchy” fruits like apples and pears. However, if you prefer other fruits you can adjust it to your liking!
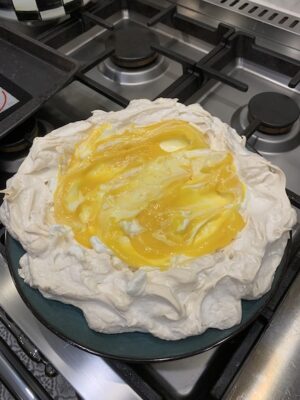
For the lemon curd, I generally reduce the sugar by a half as well to reduce the overall sweetness of the pavlova. This lemon curd is perfect to make since it adds a tangy taste to the pavlova and also uses up the leftover egg yolks. For the lemon curd, I recommend removing it from heat the moment it starts thickening, so you don’t overcook it. The curd will become more solid as it cools down and you don’t want lemon jello.
And now the best part!
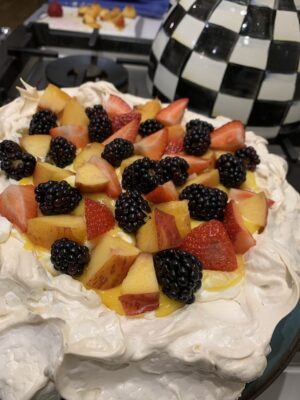
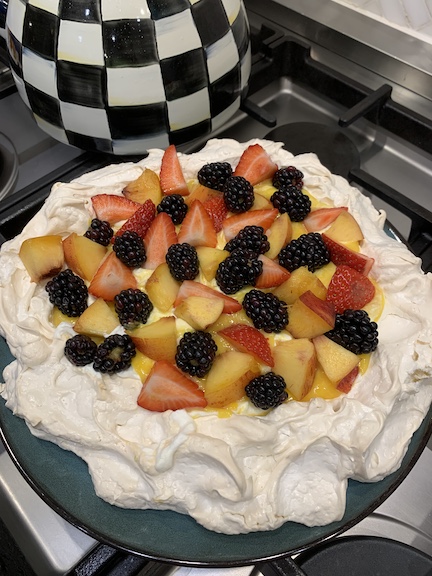
To assemble the pavlova, move your meringue onto the plate or stand you plan to serve it on. Spoon on the whipped cream first and then the lemon curd afterwards. I sometimes like to mix the curds and cream a little bit so it looks like a “pot of gold”. Place your berries on top and it’s ready to serve! Enjoy!
Note: Sometimes I like to put the pavlova in the fridge for an hour after assembling so the flavors “marinate”


